1: Introduction
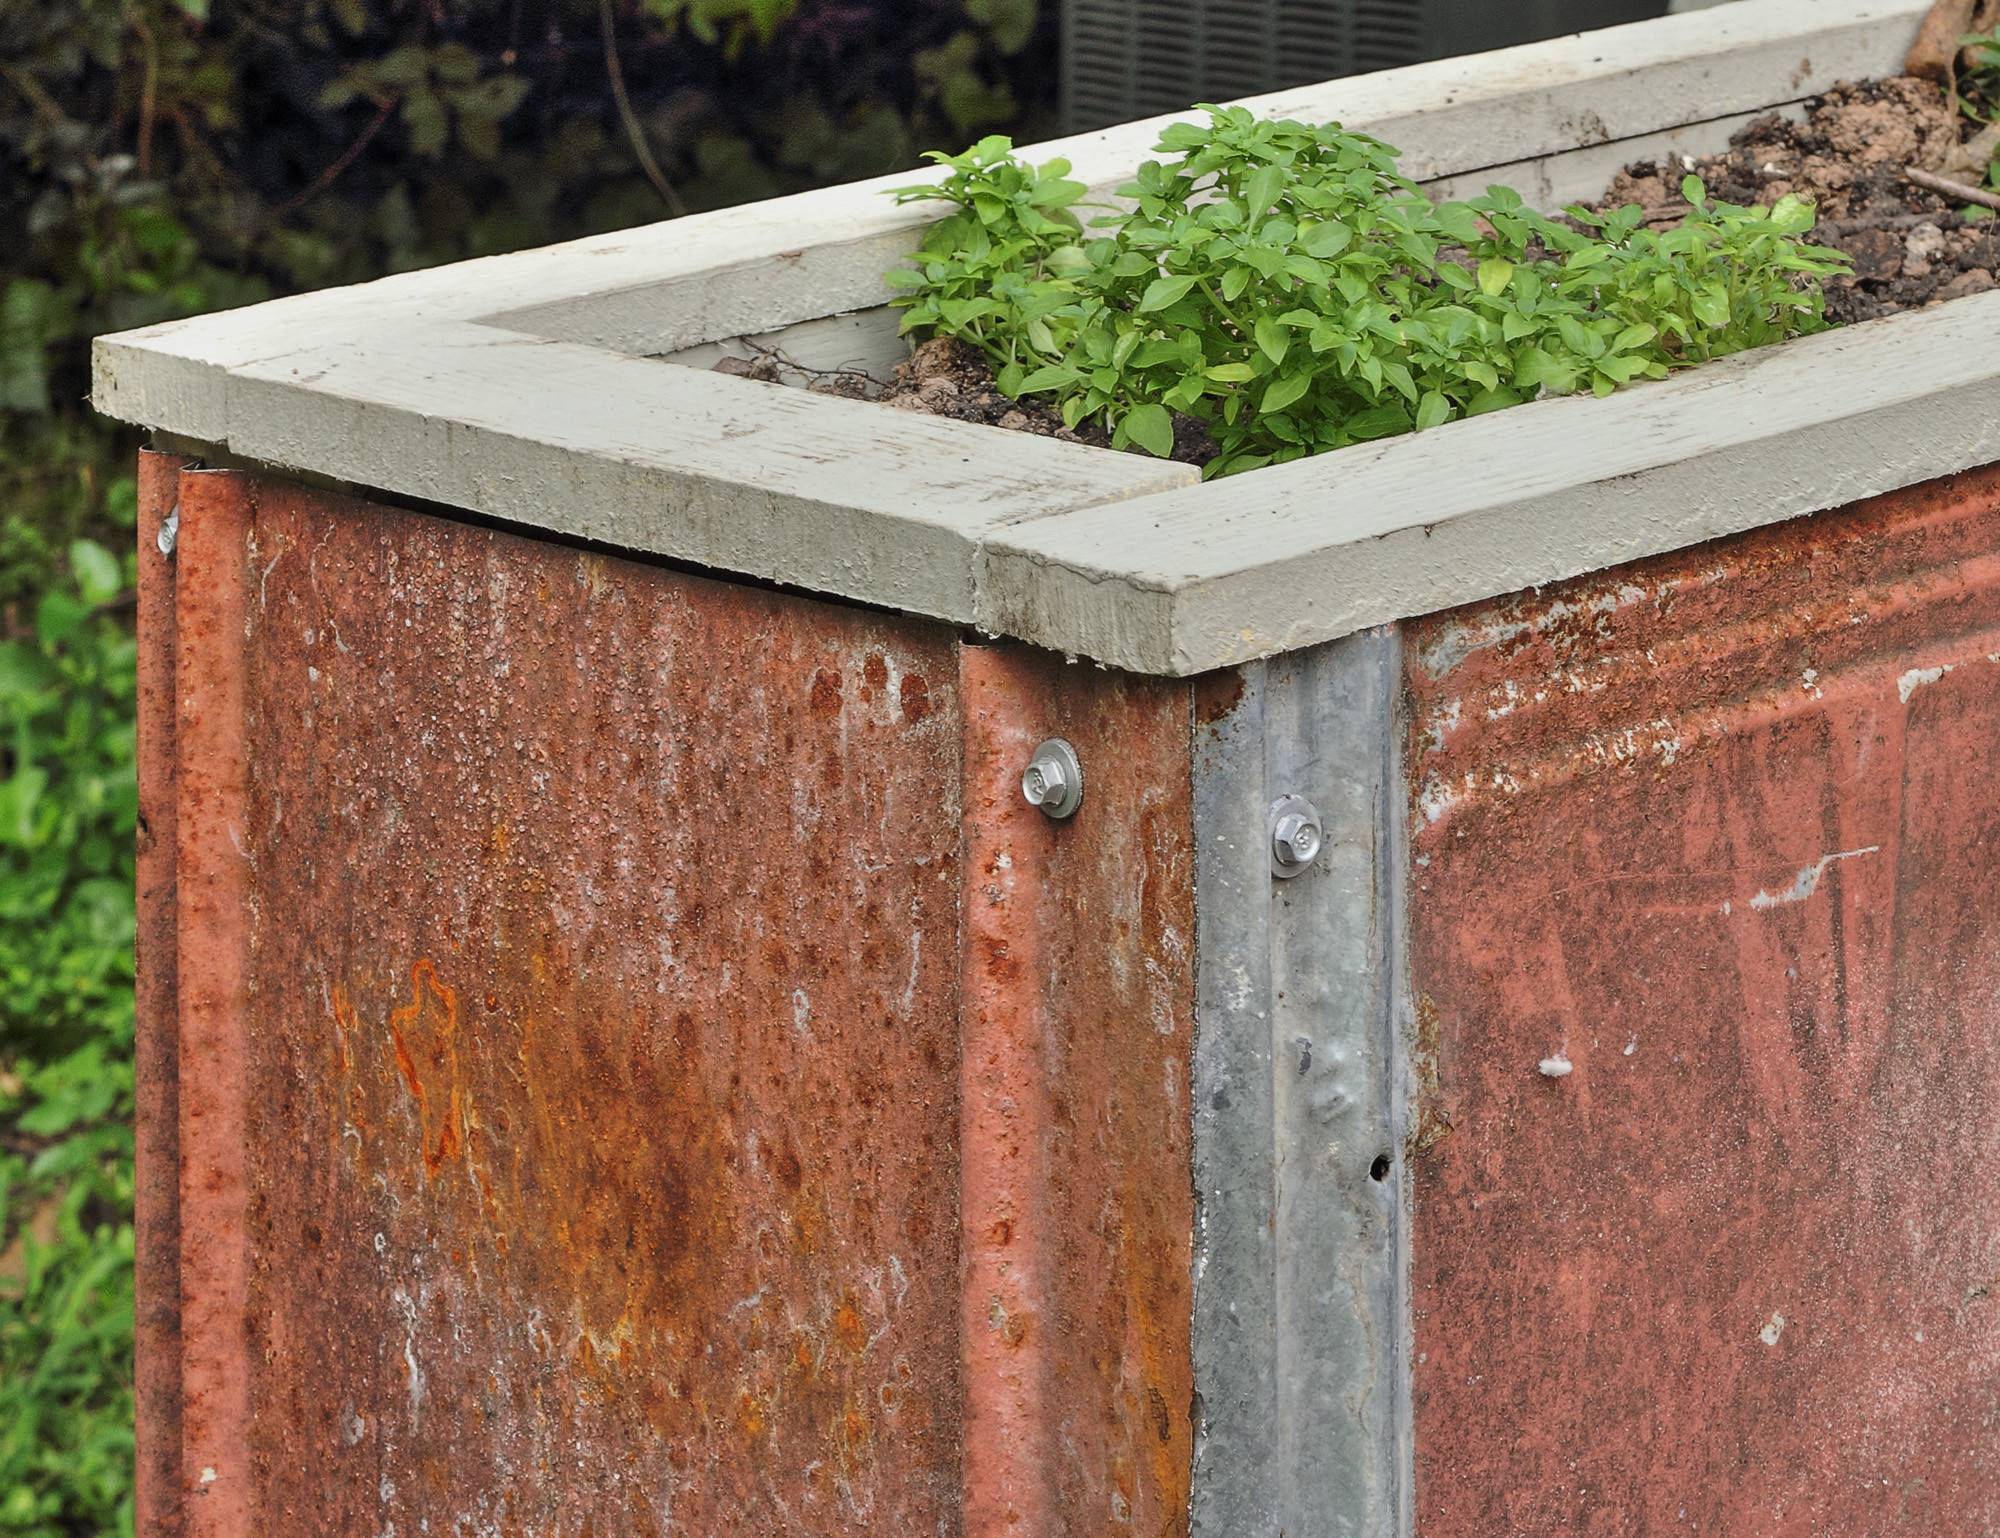
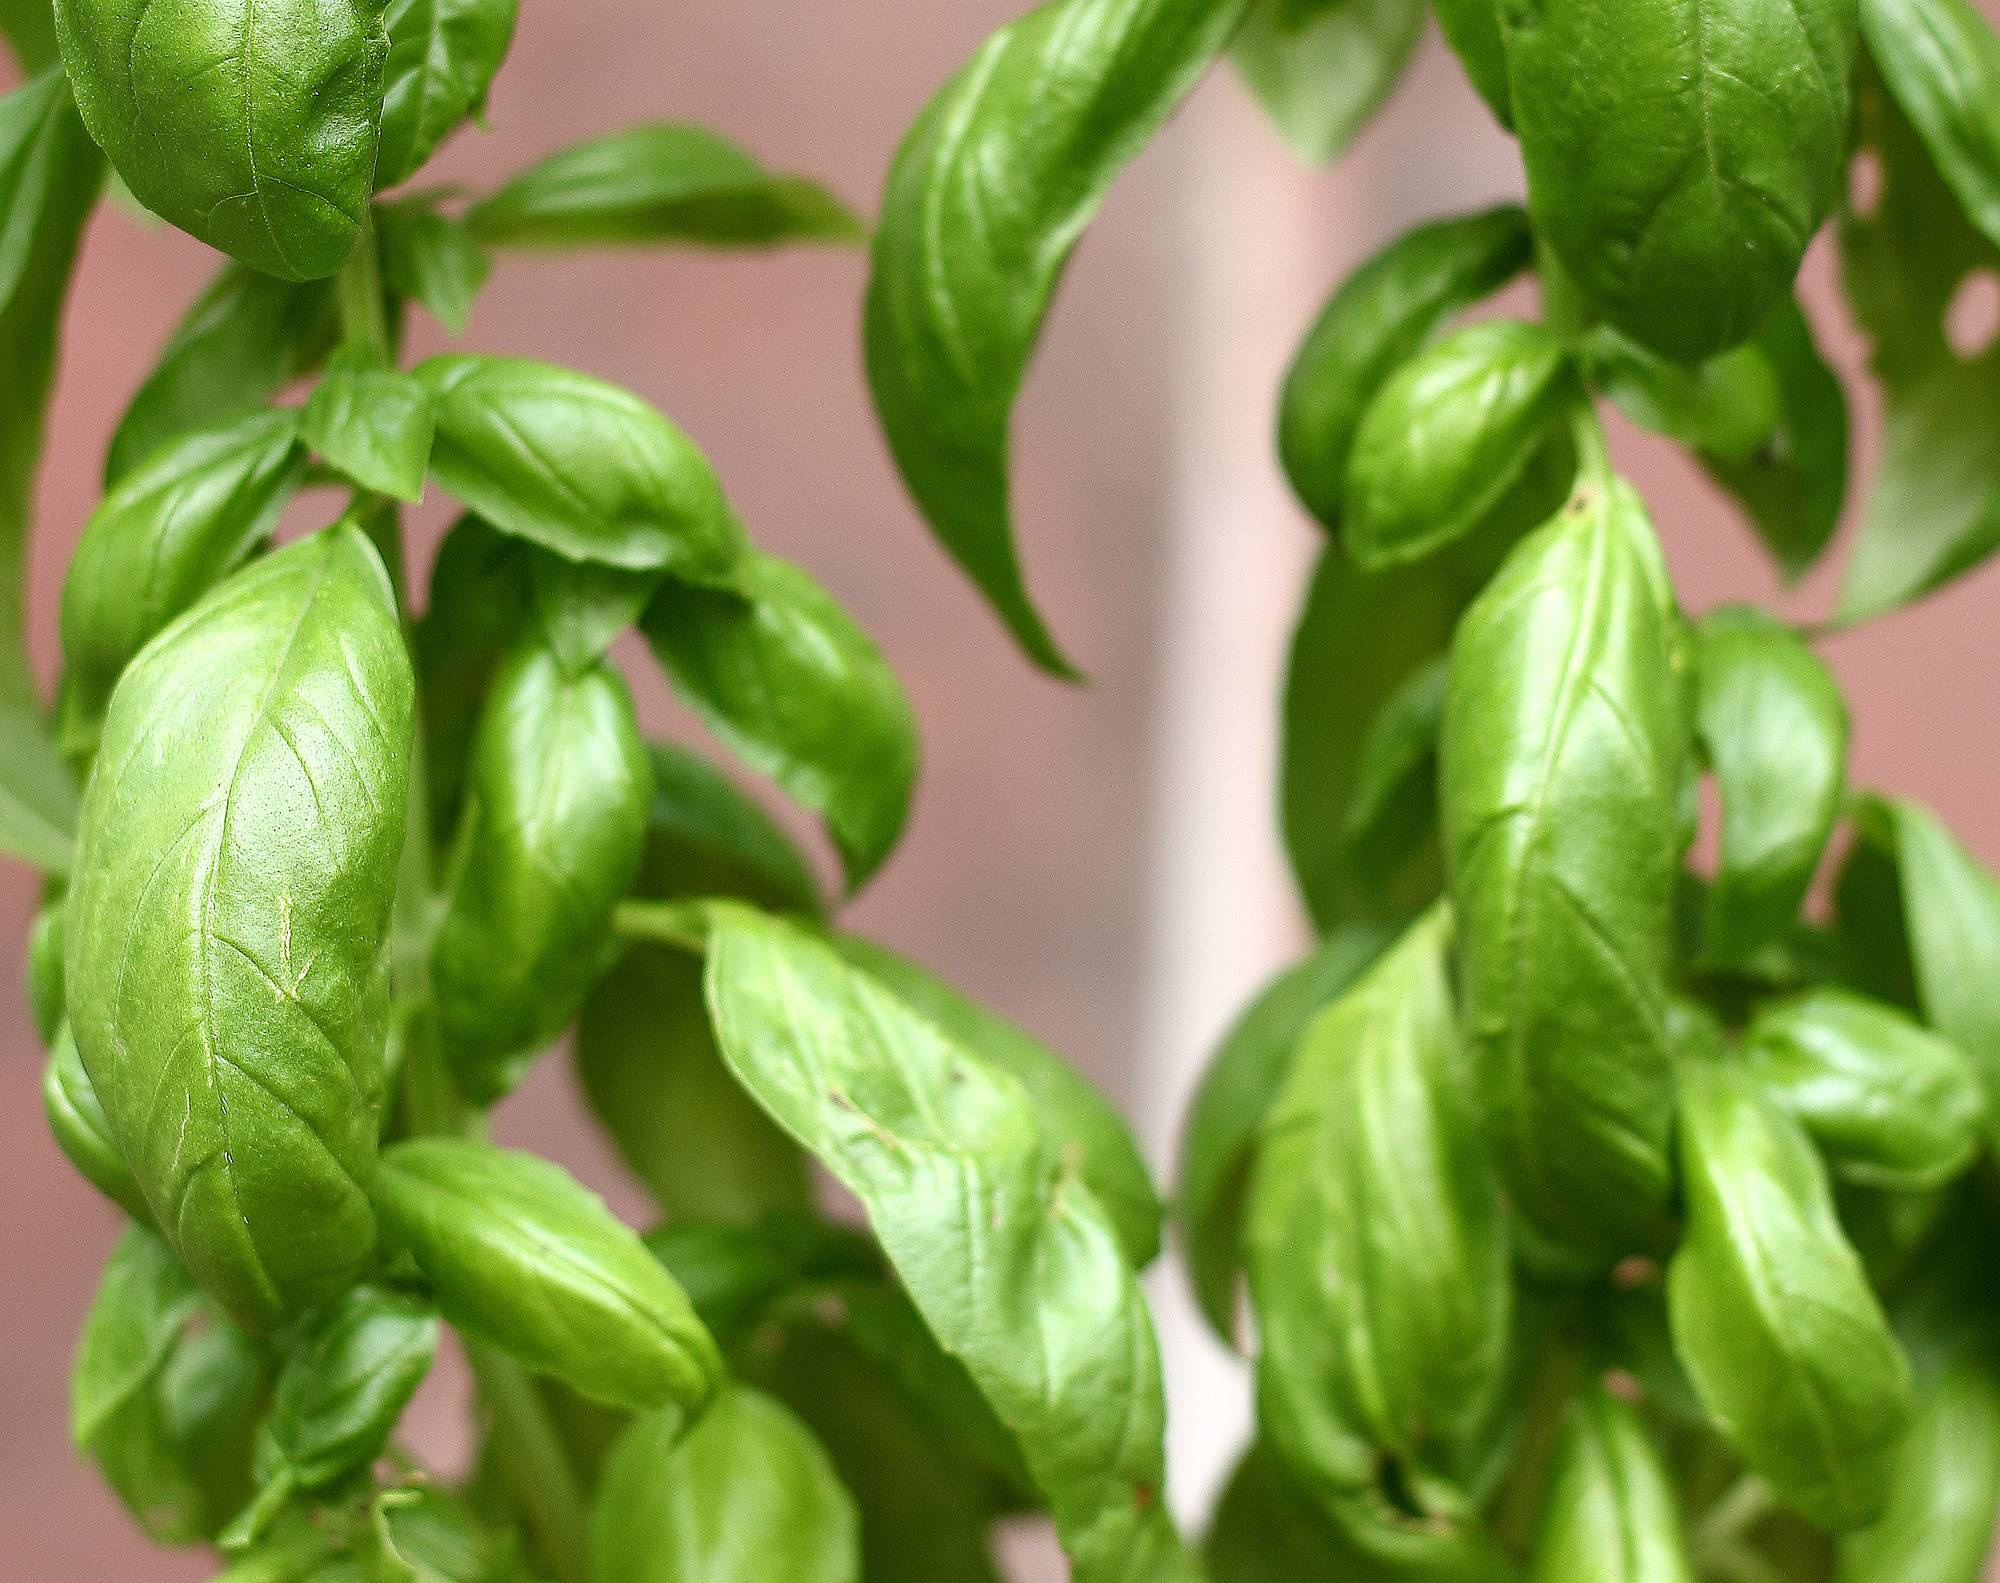
Fresh herbs are an absolute requirement for good cooking. There's nothing that can substitute for just-picked basil. If you love good food and you want to make your own, you can either buy it every week, or you can grow it yourself. My wife and I chose the grow-it-yourself route, and my job is to make it as easy as I can to maintain the watering and care schedule. That translates into an elevated planter -- it's easier to keep an eye on things, and easier to weed and water. As I continue to renovate our 1920s house and turn the backyard into a place we can enjoy, I saw an opportunity to make these planters into features.
2: The plan
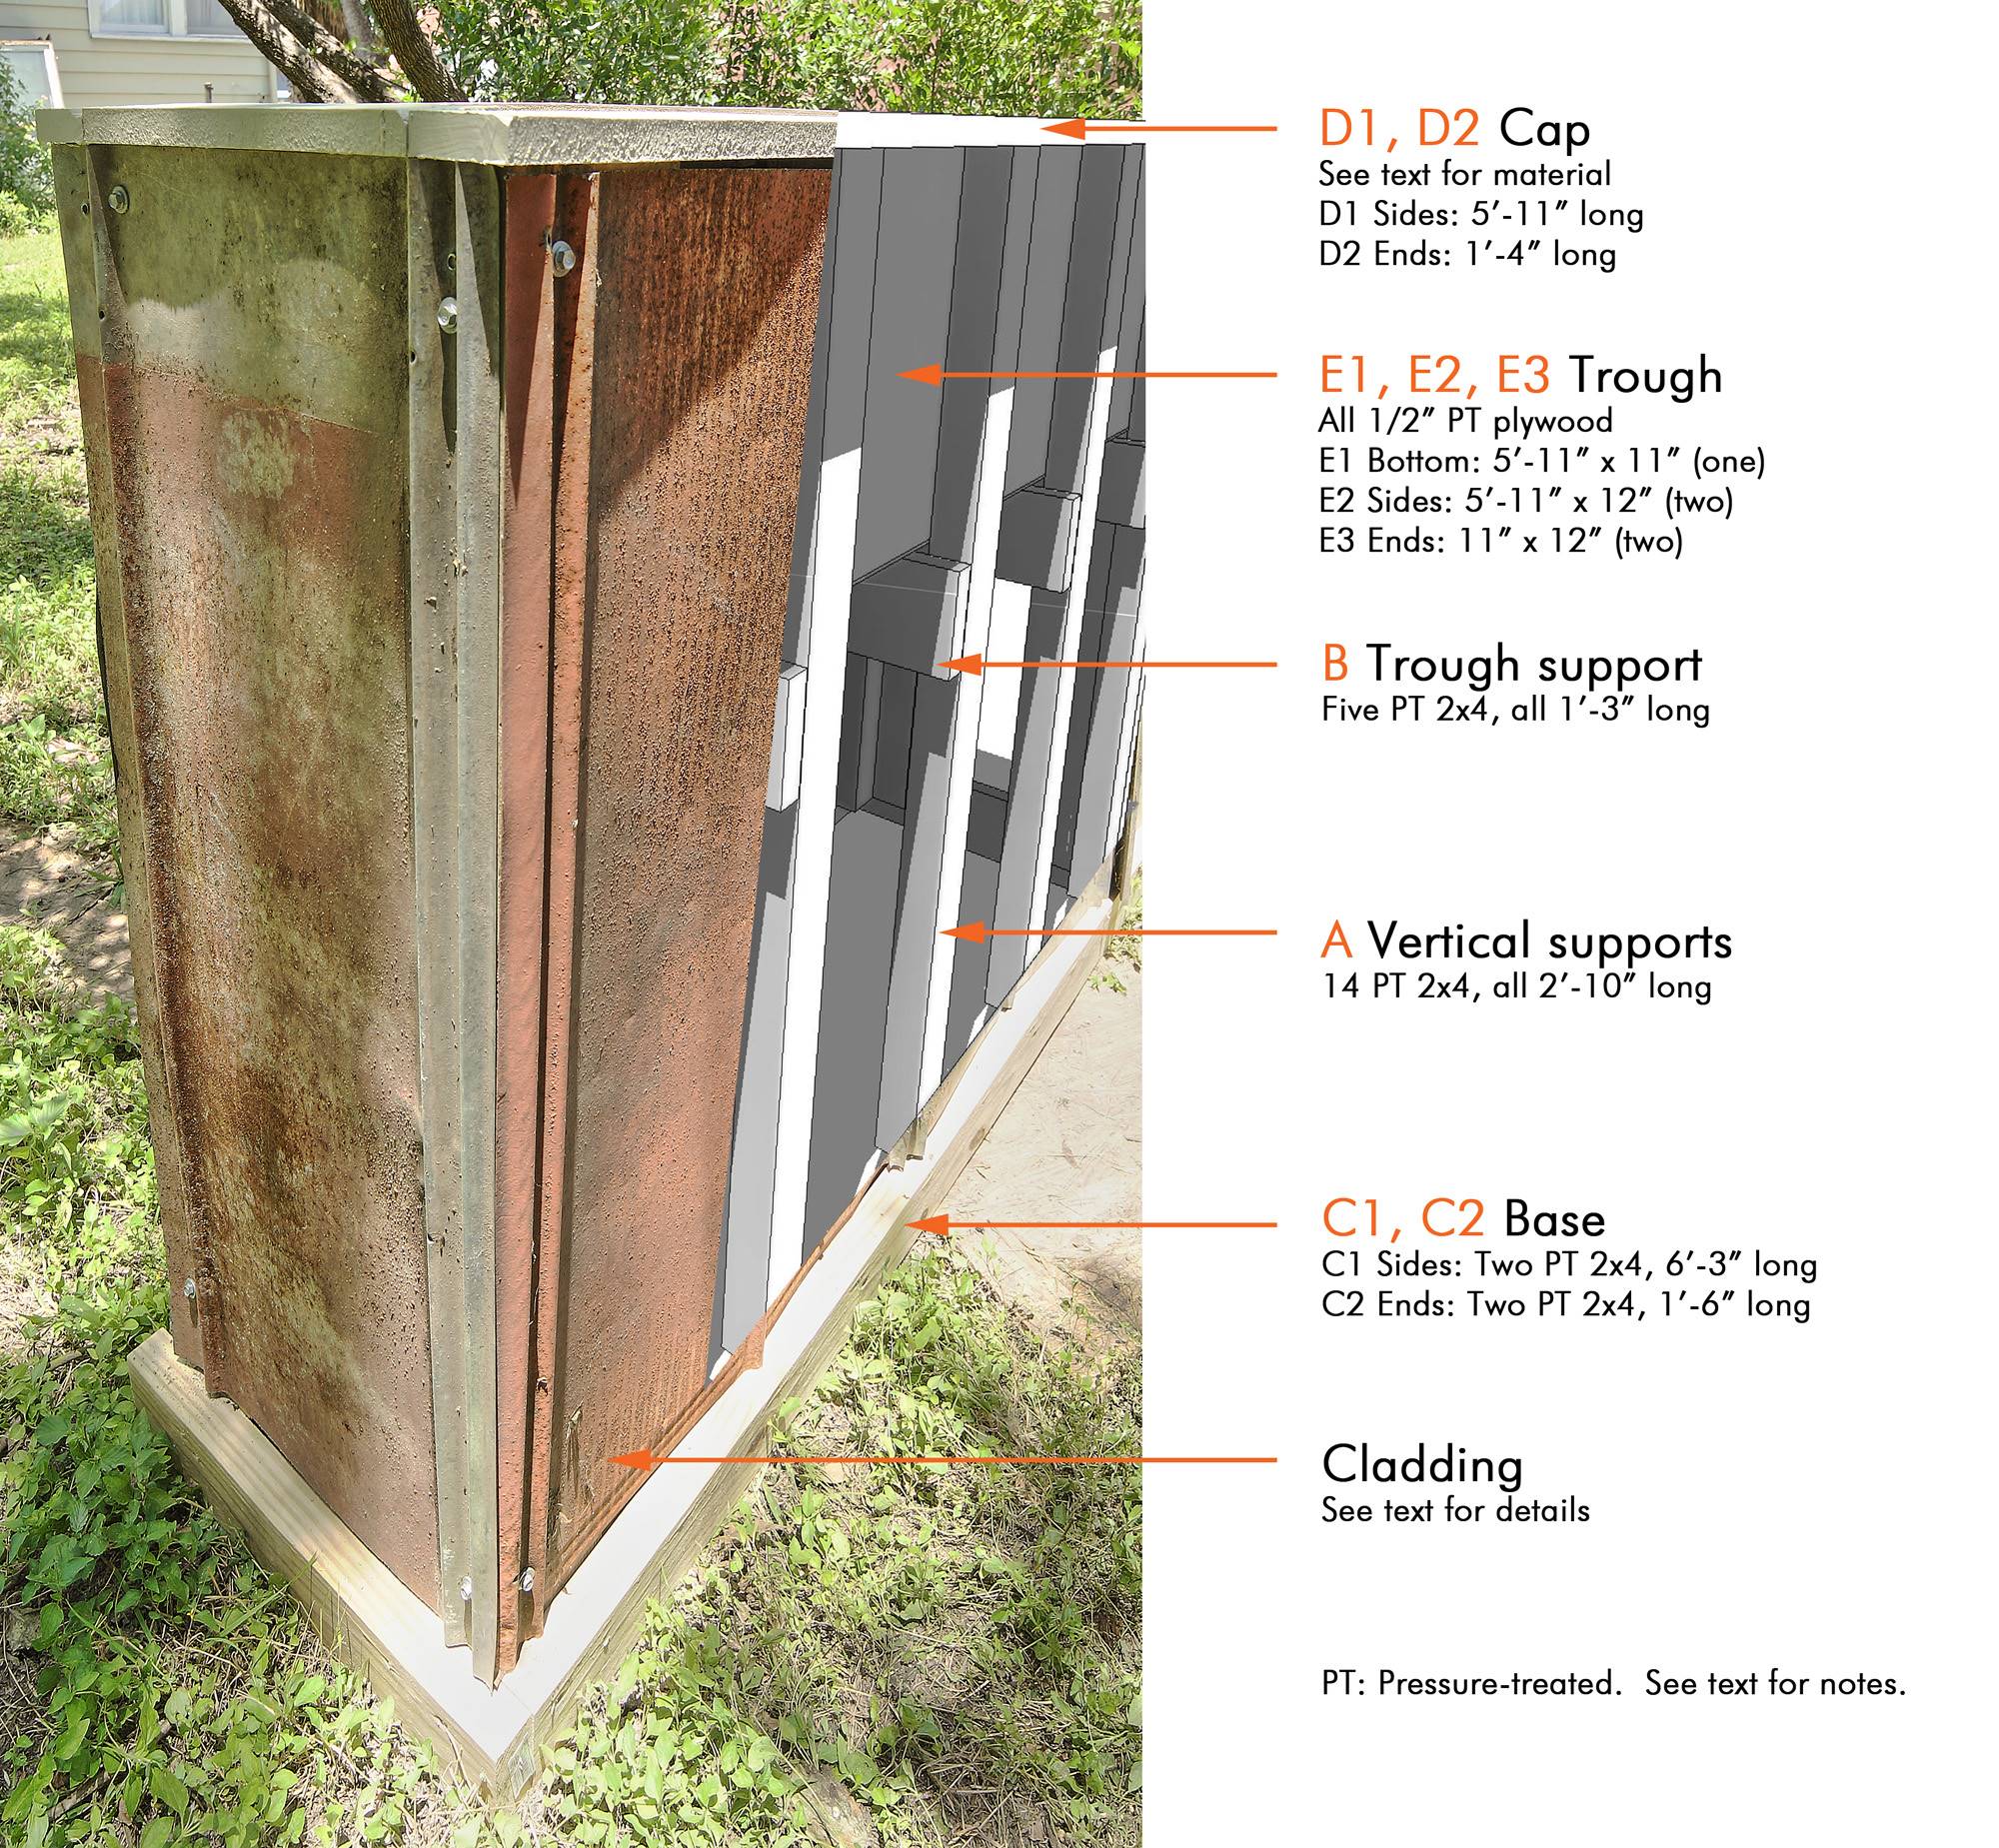
For your reading and building pleasure, I've created a PDF with plans which you can download from Work5hop's website. Feel free to modify dimensions as you see fit: this design is based on my needs, and yours probably differ. These plans will yield a finished product about four feet tall and six feet wide -- that's quite a large planter, and each one will weigh close to 150 pounds empty and 300 pounds with soil. You may not need or want something as large as that.
3: Materials
These are going to live outside and are intended to last for a long time, so the materials need to resist deterioration. Furthermore, the structural materials will be hidden by the cladding, so it should be inexpensive. Preservative-treated (AKA pressure-treated, AKA PT) pine is a good balance of those qualities. I've chosen PT 2x4s and 1/2" PT plywood as the main components.
Cladding is up to you and your situation. You could use almost anything: reclaimed lumber, siding to match your house, painted plywood, metal roofing (as I've done here), or even nothing at all. Go wild. I've included some trim on the top to clean things up; you can leave it off if you want, but your planter will look a lot more finished with it in place. A PT 1x3 or some cement board trim will do the trick; you can also scavenge material for this. This piece could be non-treated, painted lumber as well.
For fasteners, it will depend on what tools you have. A nailgun will handle some of this easily, but everything can be screwed together and will result in a stronger finished product. You must use either galvanized nails or stainless steel or coated screws with the treated lumber -- otherwise, the fasteners will rust out quickly. PT lumber is pretty soft stuff, so I generally don't pre-drill screws. If your lumber splits at the ends or if you're breaking screws, then you'll need to pre-drill the holes for them.
A few words about the preservatives used in PT lumber: if they're any good, then they're good at killing things. Might be a consideration for something in which we're growing things to eat, no? Used to be, arsenic was the primary ingredient in the preservative mix; it was phased out in 2004 or so for the lumber you and I can buy, although it's still used for certain industrial uses. NEVER use arsenic-treated lumber in anything that could have food contact.
Modern preservative treatments use a mix of copper, azole (a biocide which is also used to treat crops), and/or borates. Do you want to eat any of that? No. However, the leaching of those materials into the soil is minimal enough that it appears to be safe in this situation. If you're still worried about it, consider an inert liner inside the plywood to prevent contact between the plywood and soil.
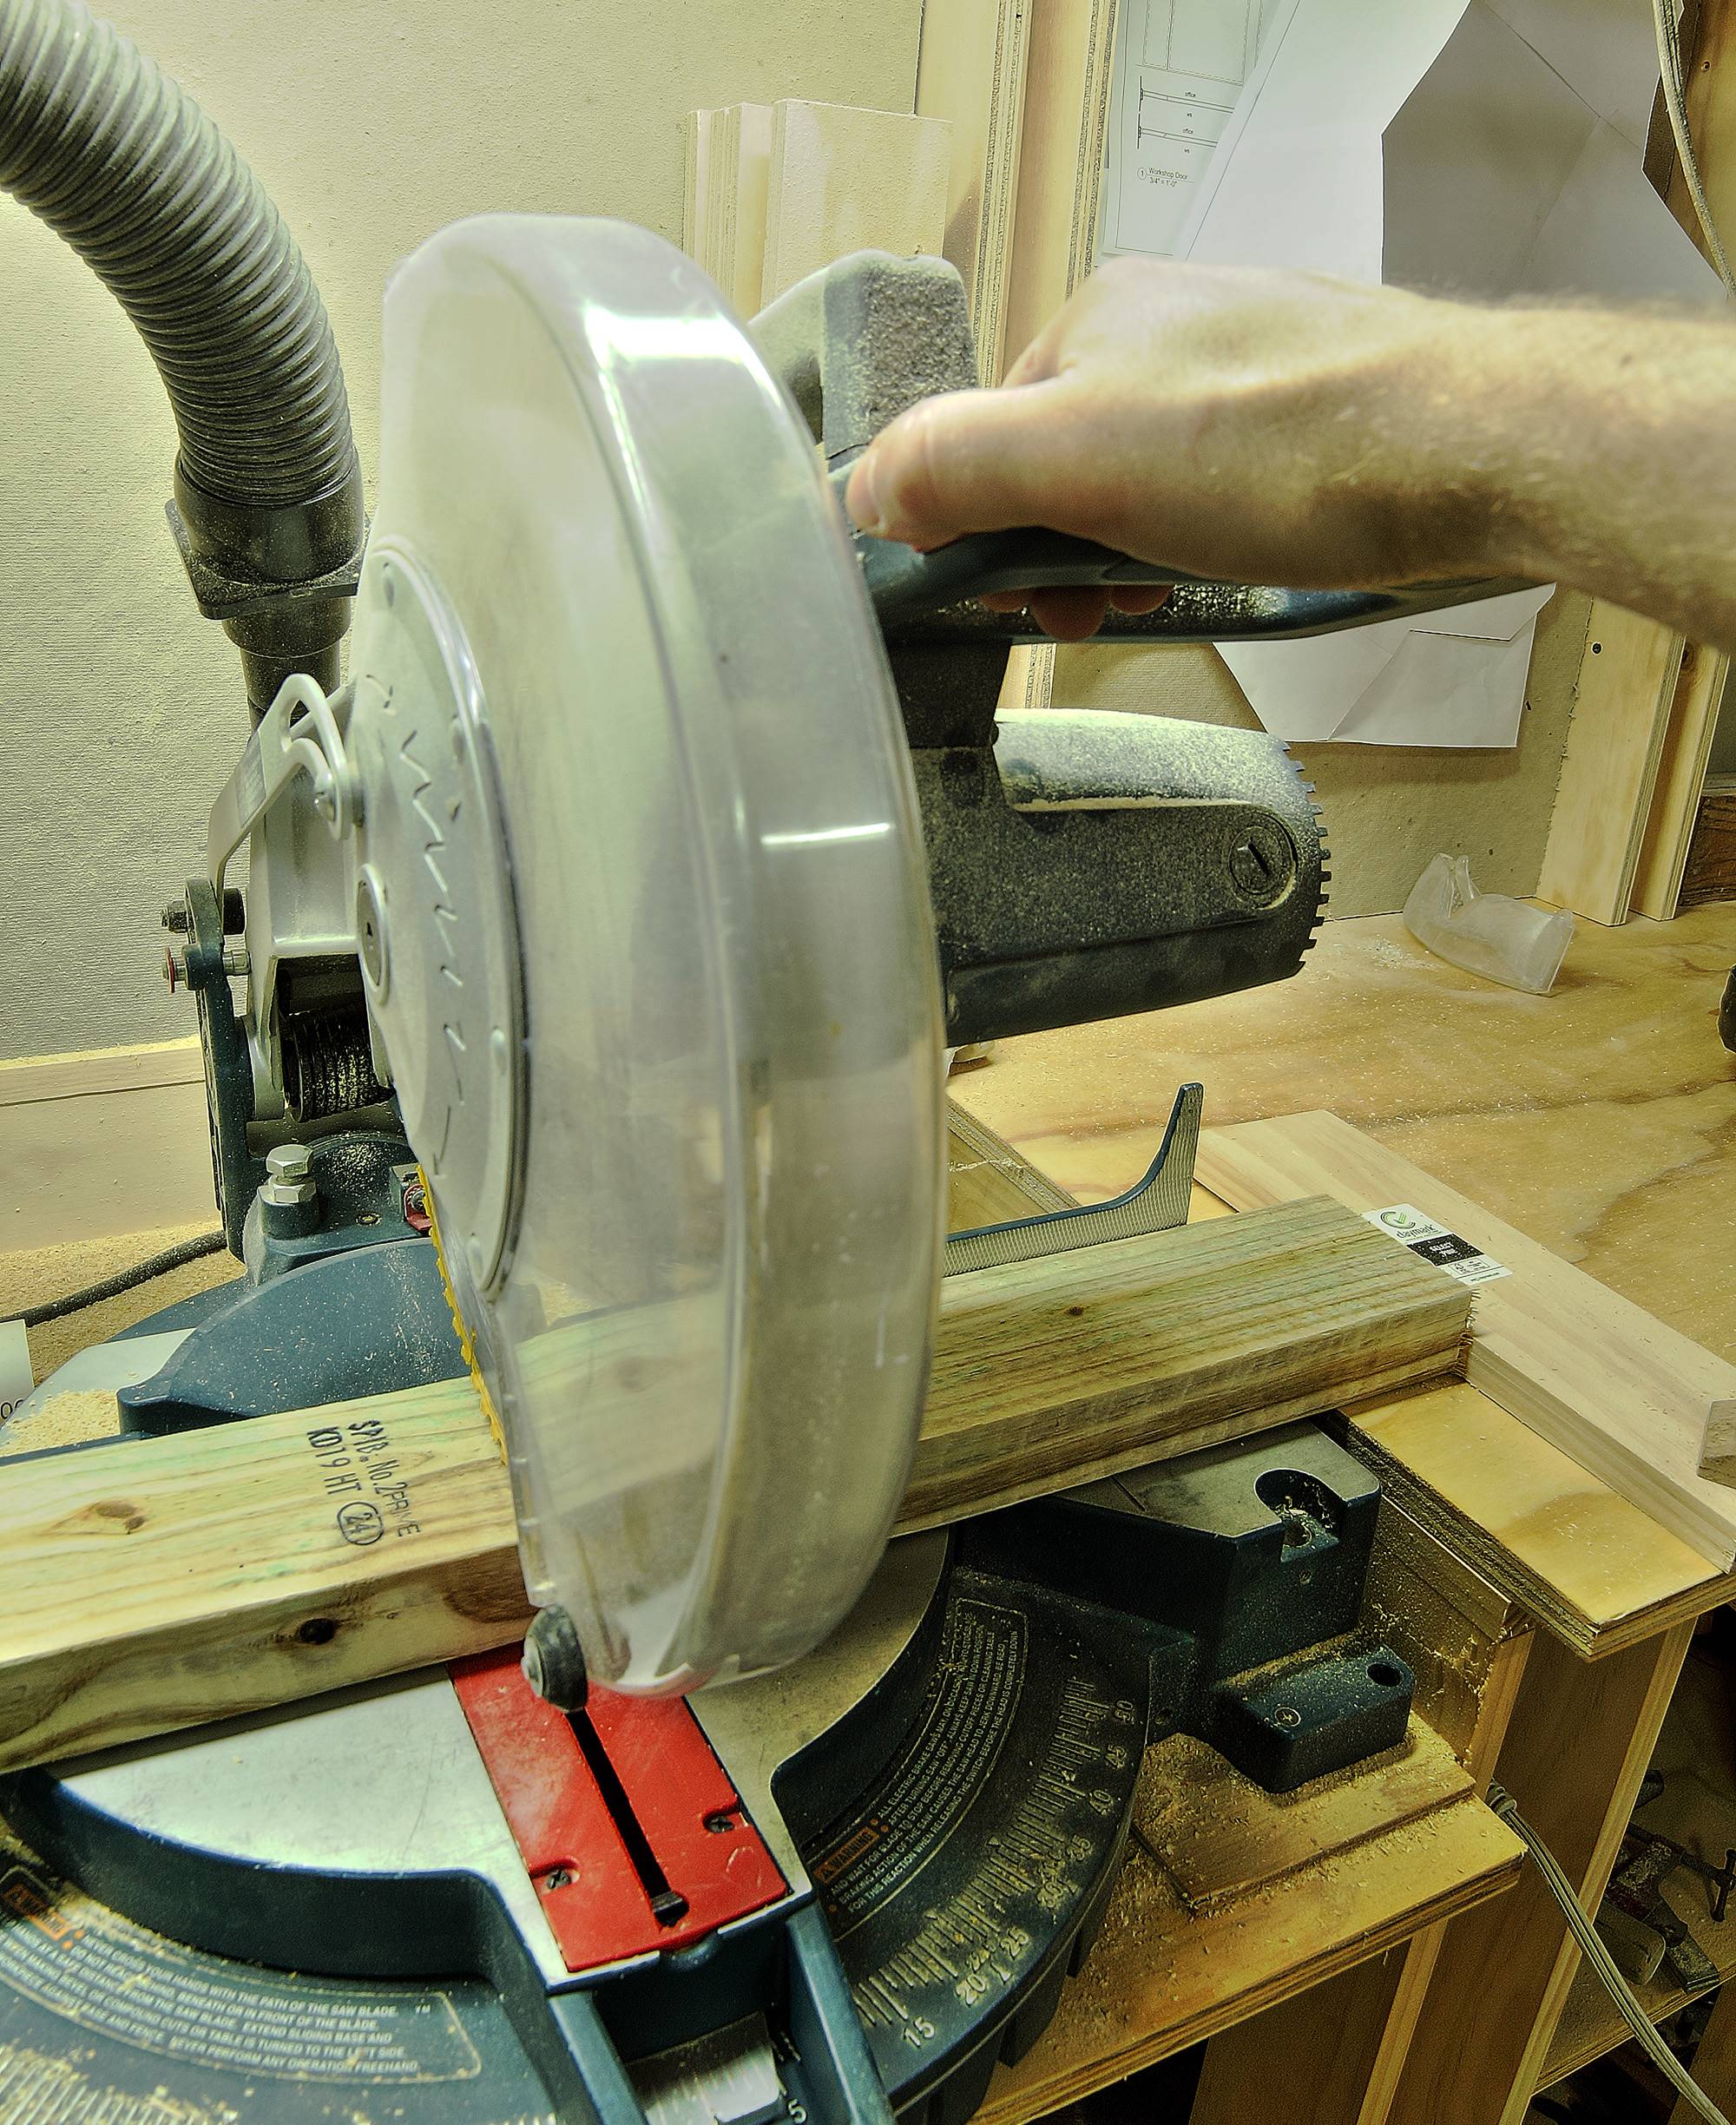
4: Cut the lumber
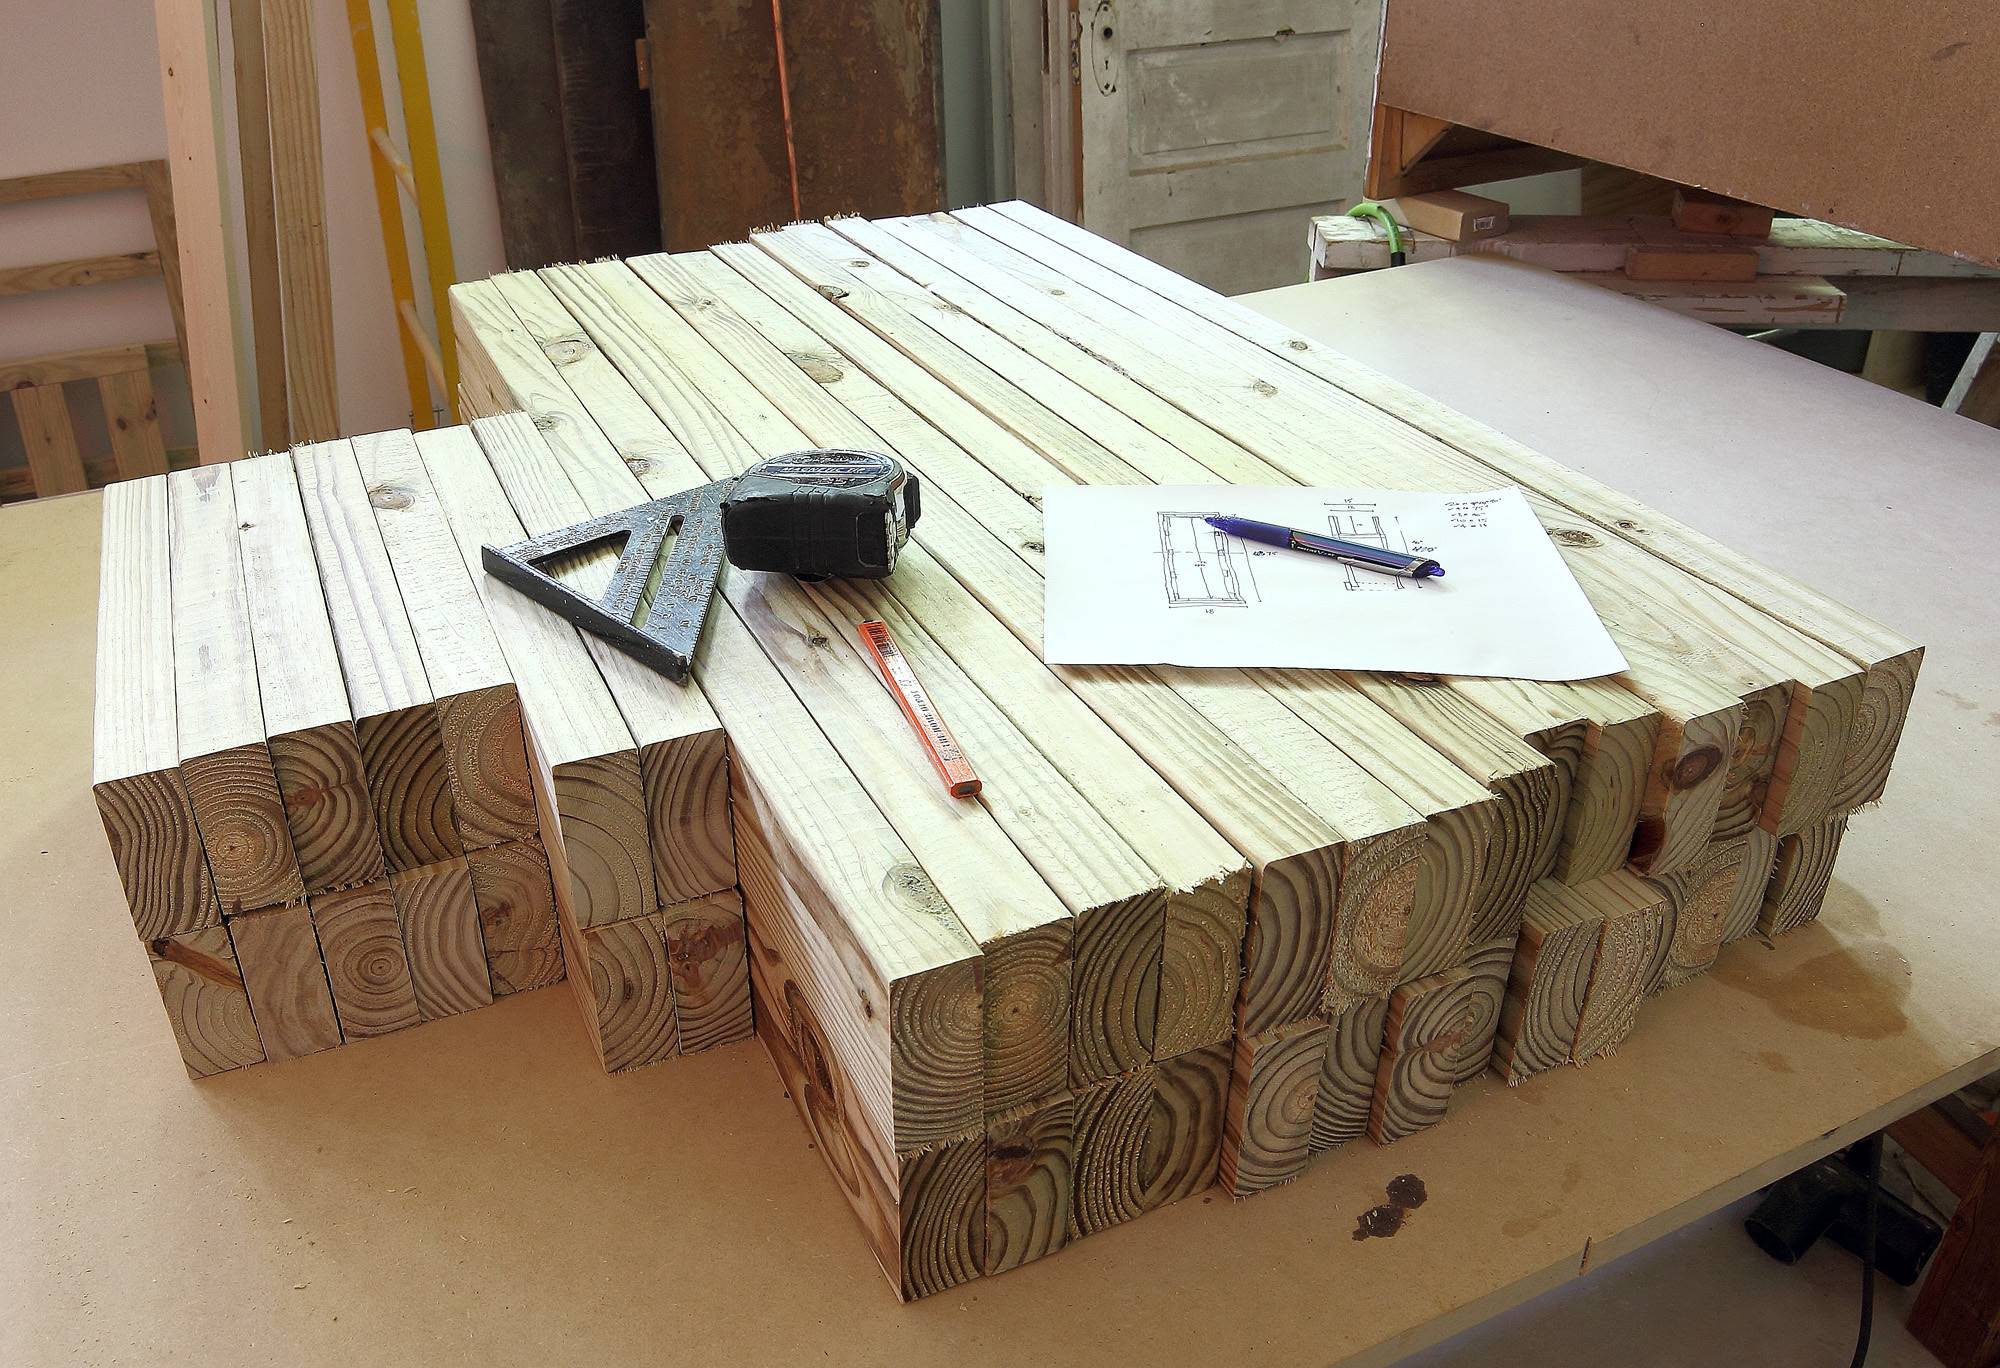
Channel your inner Henry Ford, and do this production-line style. It will be faster and more accurate than measuring and cutting each piece individually. A miter saw is the best tool for this job. Set up a stop block, and you can blow and go through this in just a few minutes. If all you have is a circular saw (or even just a jigsaw), you can line all the boards up so that the ends are aligned, measure and mark one long line, and cut through them all at once. Whatever your method, you'll end up with a tidy collection of boards. Double-check to make sure they're all the same length, within 1/8" or so. If they aren't, you'll struggle with that later.
For the plywood, unless you have a table saw (in which case you probably don't need me to tell you how to do this), you'll be using a circular or jig saw to cut the plywood. Measure and mark out the pieces you need, then cut along the lines.
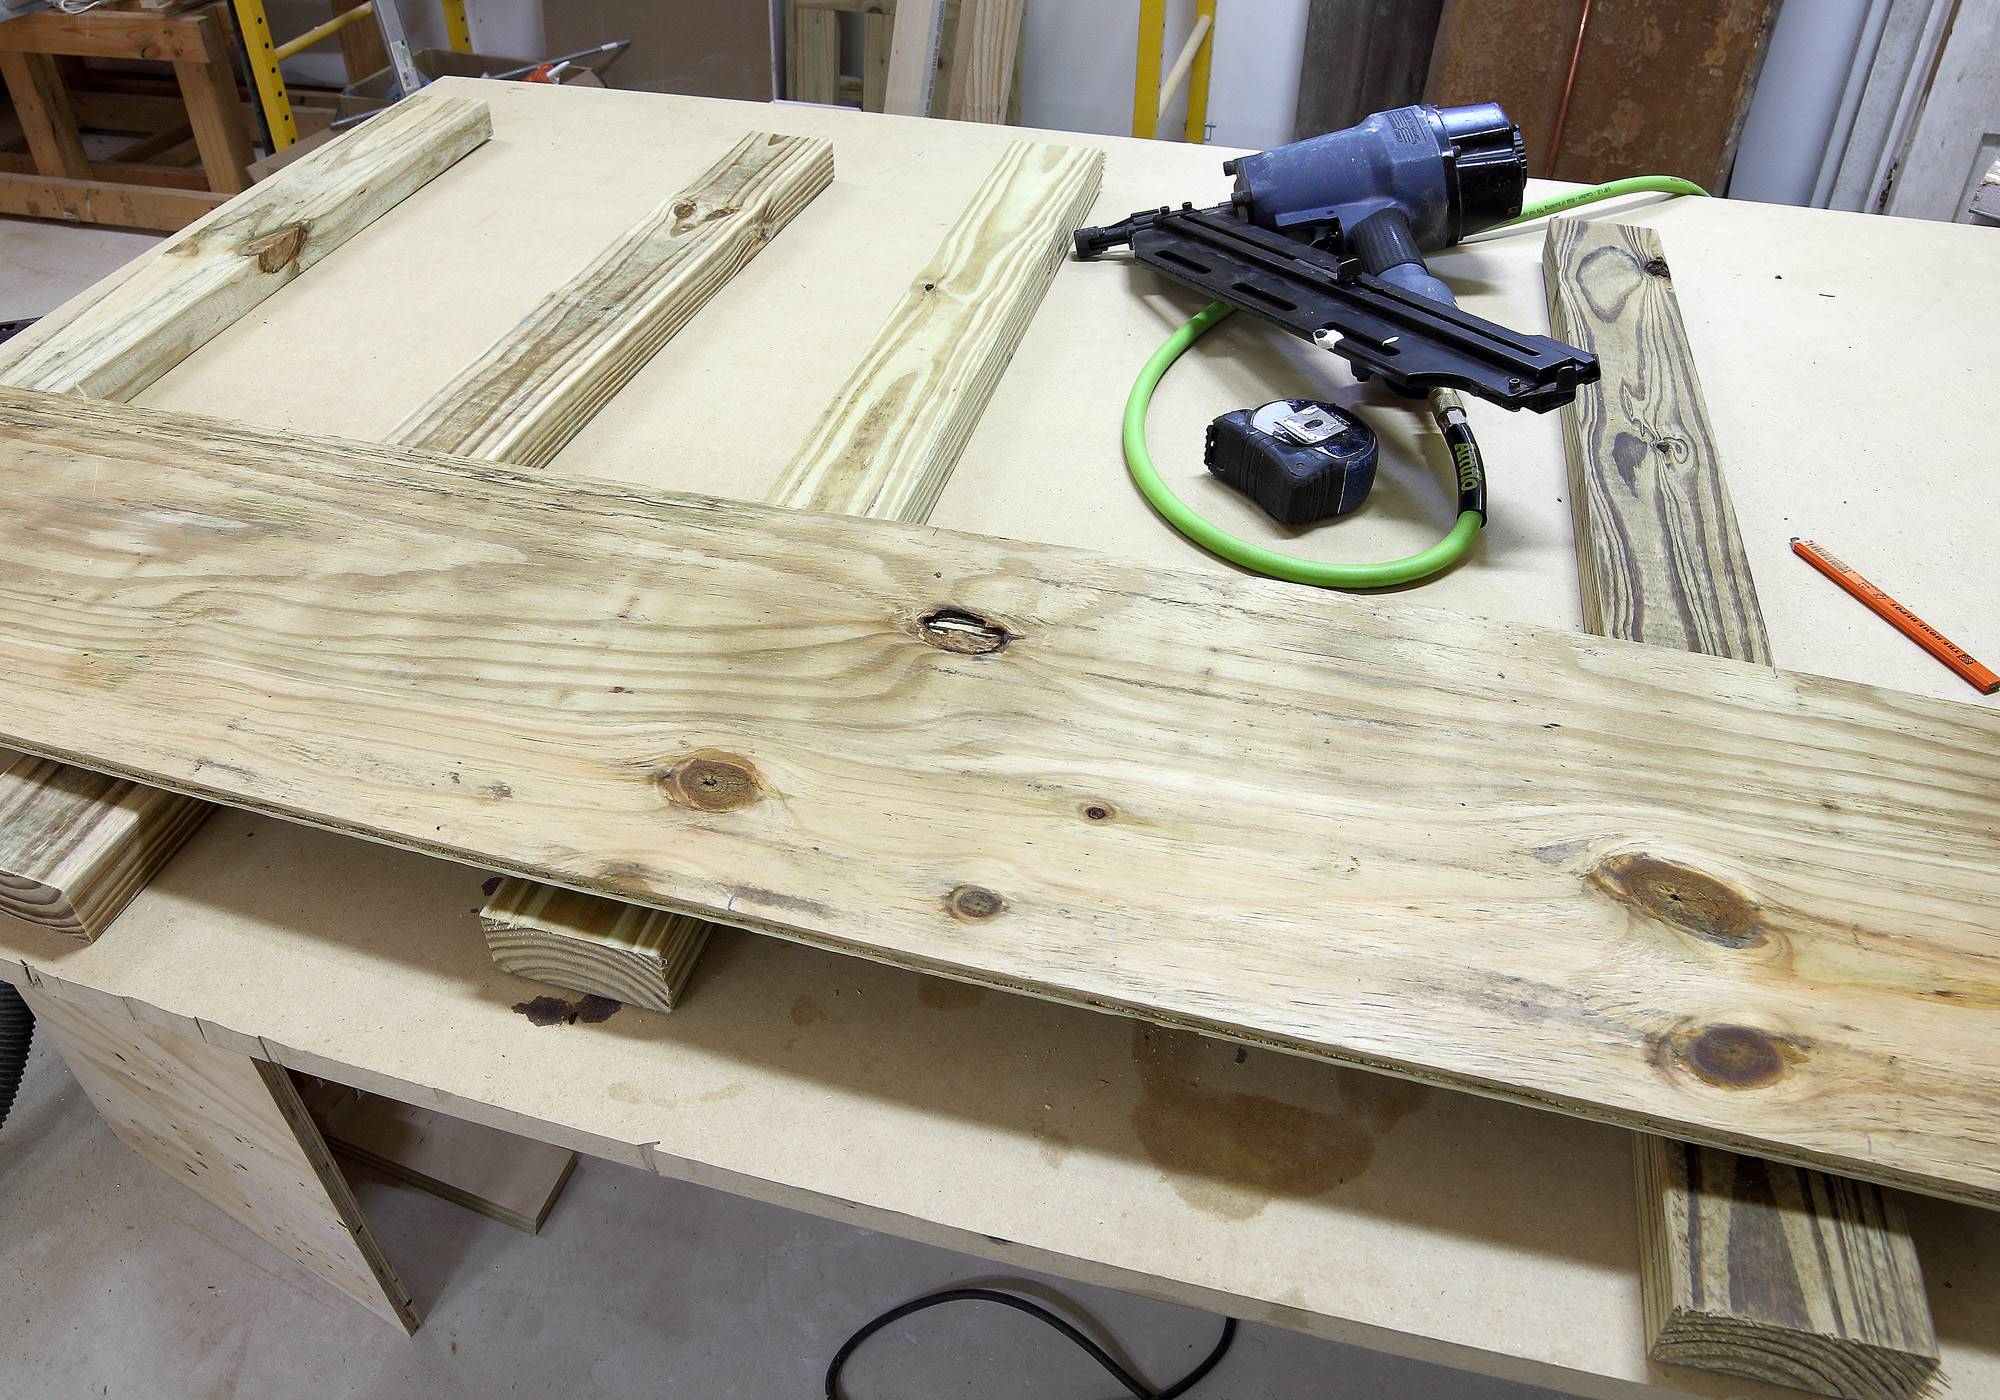
5: Build the long sides
The easiest way to start construction is to attach the vertical boards to the long pieces of plywood to make the sides. Use nails if you've got a nailgun, but otherwise, screws are easier and better than hand nailing. Follow the fastener pattern in the PDF. Before you move on to the other side, go ahead and attach the base piece to the bottom of the vertical boards. This piece ties them all together, which is good, but it also prevents the end grain of the vertical boards from sitting on the ground. That's the weak point in all lumber -- think of wood as a bunch of straws tied together. The end grain is a cross-section of those straws, and it will suck water up from the ground and accelerate deterioration. This base piece prevents that by lifting the end grain up off the ground: use a block of wood as a spacer to be sure that the end grain isn't on the ground. See the PDF for a visual.
Do both sides, then get the leftover long boards and get ready to attach the...
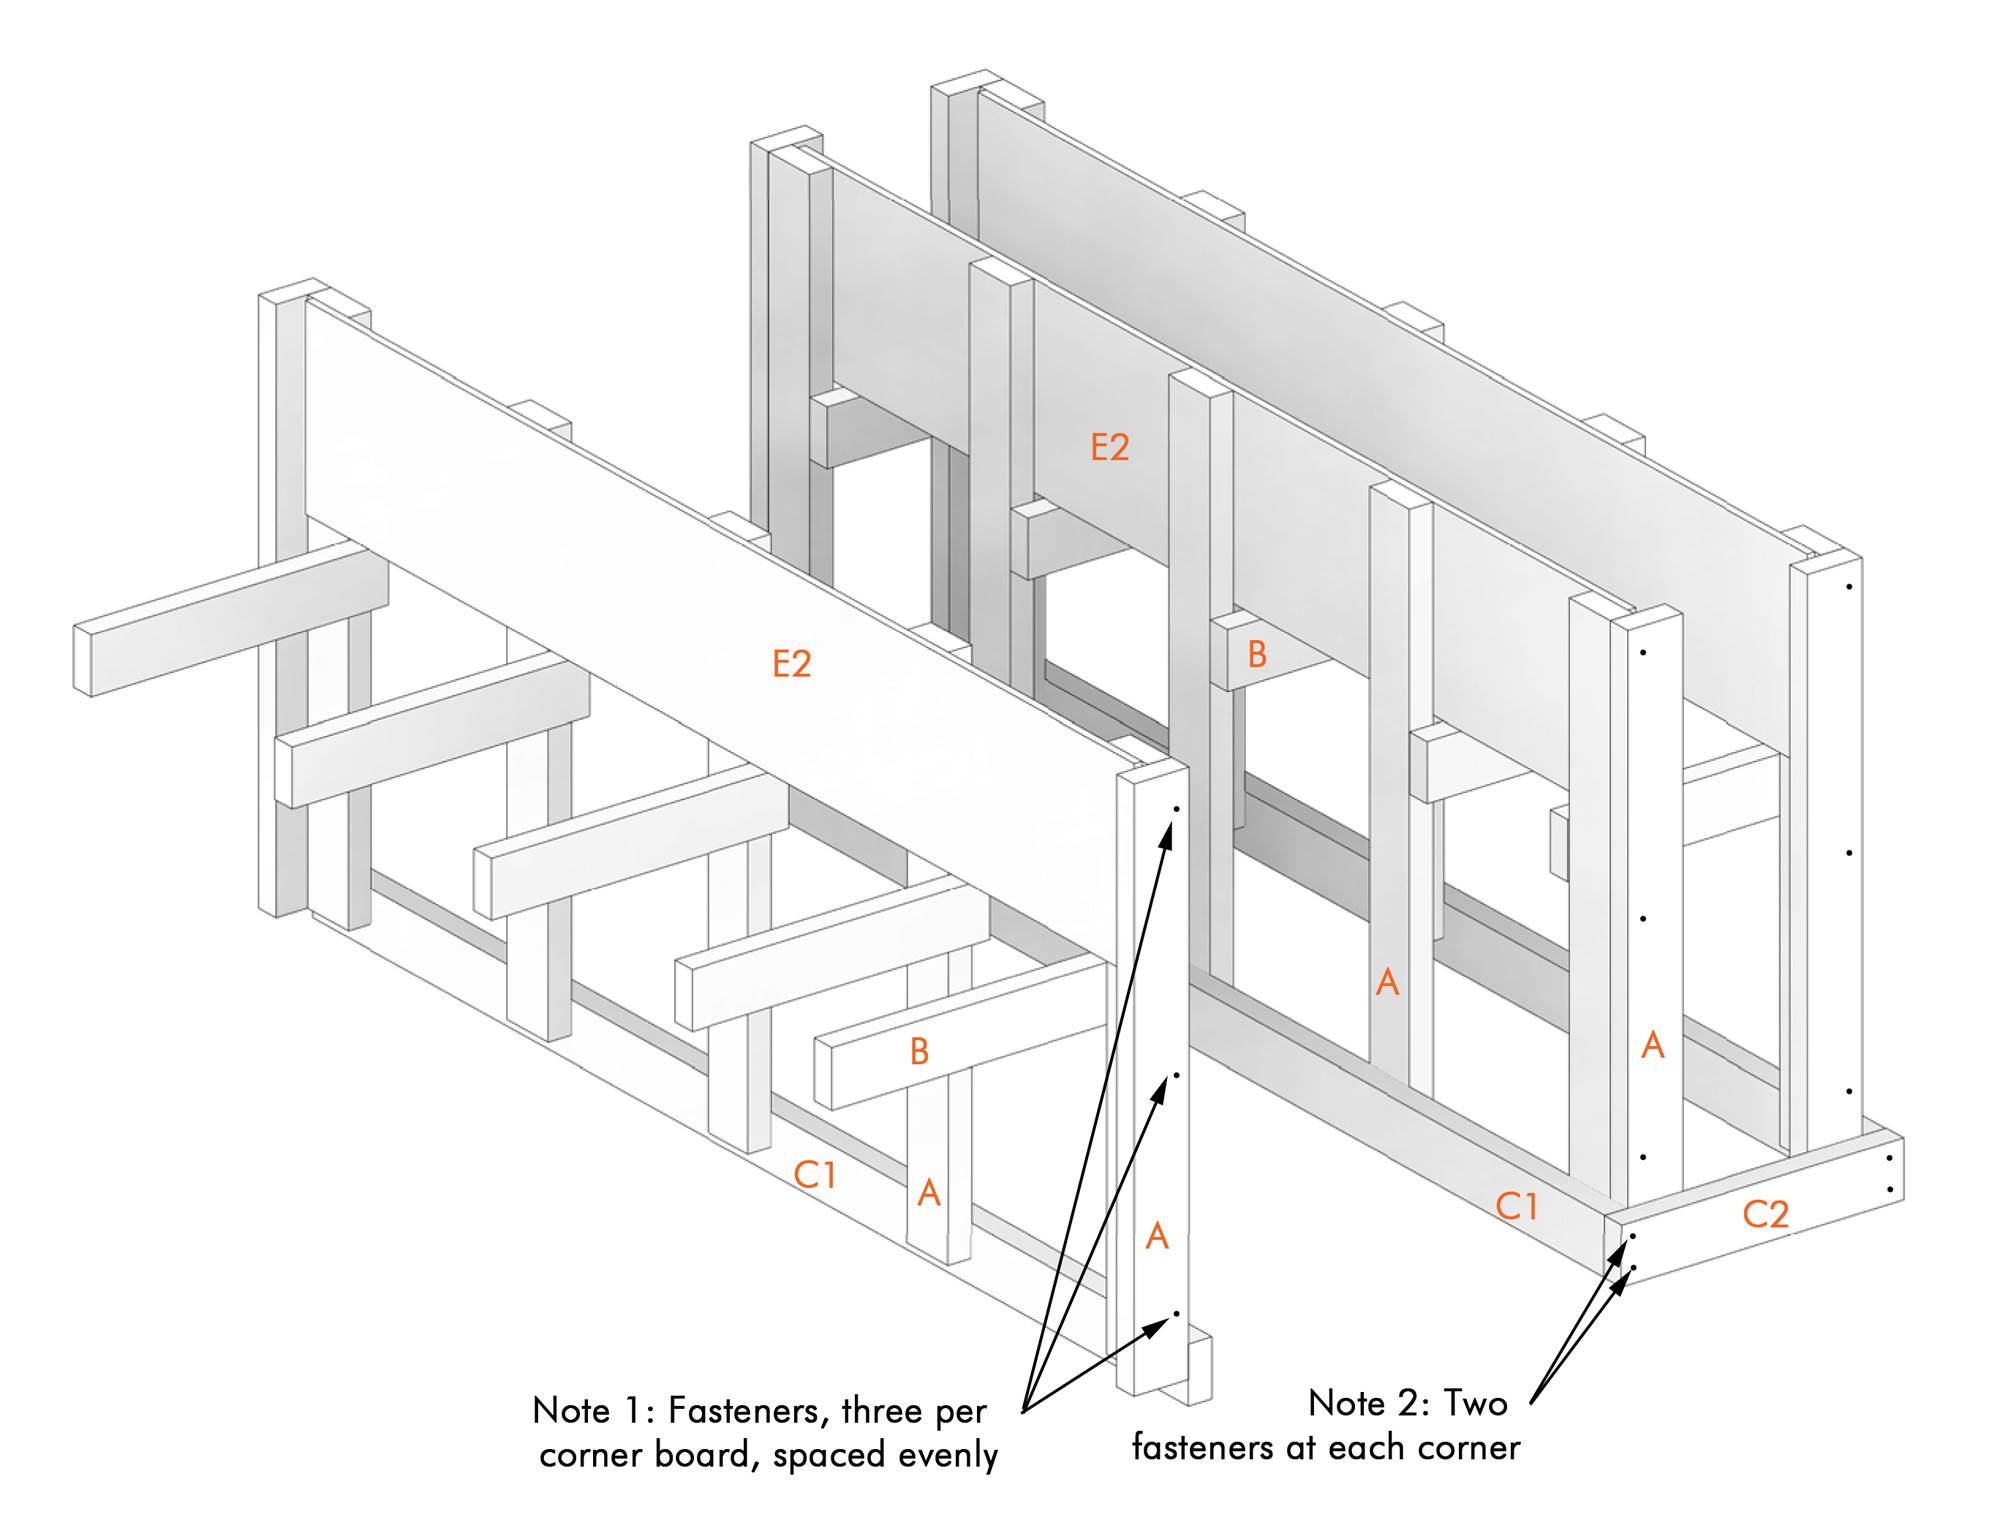
6: Corners, and into three dimensions
Again, follow the fastener pattern in the PDF. Do it right. These corner pieces are what give the assembly a great deal of its strength, so don't cheat. It's easiest if you start the screws in the boards first, then hold the boards in place and drive the screws the rest of the way in. If you have three hands, that's helpful.
Ditto with the crosspieces which attach the two sides together. Lay one side down flat, hold a crosspiece at right angles to the side (use a triangle to check this), and screw the rest of the way into the vertical boards. Two screws per side. The first side is easy; the second is tough, and it's helpful to have someone else assist by holding things vertical while you drive screws. Pick the first side up off the table, line up the second side with it, and drive your screws. Attach the two base pieces across the ends now, too.
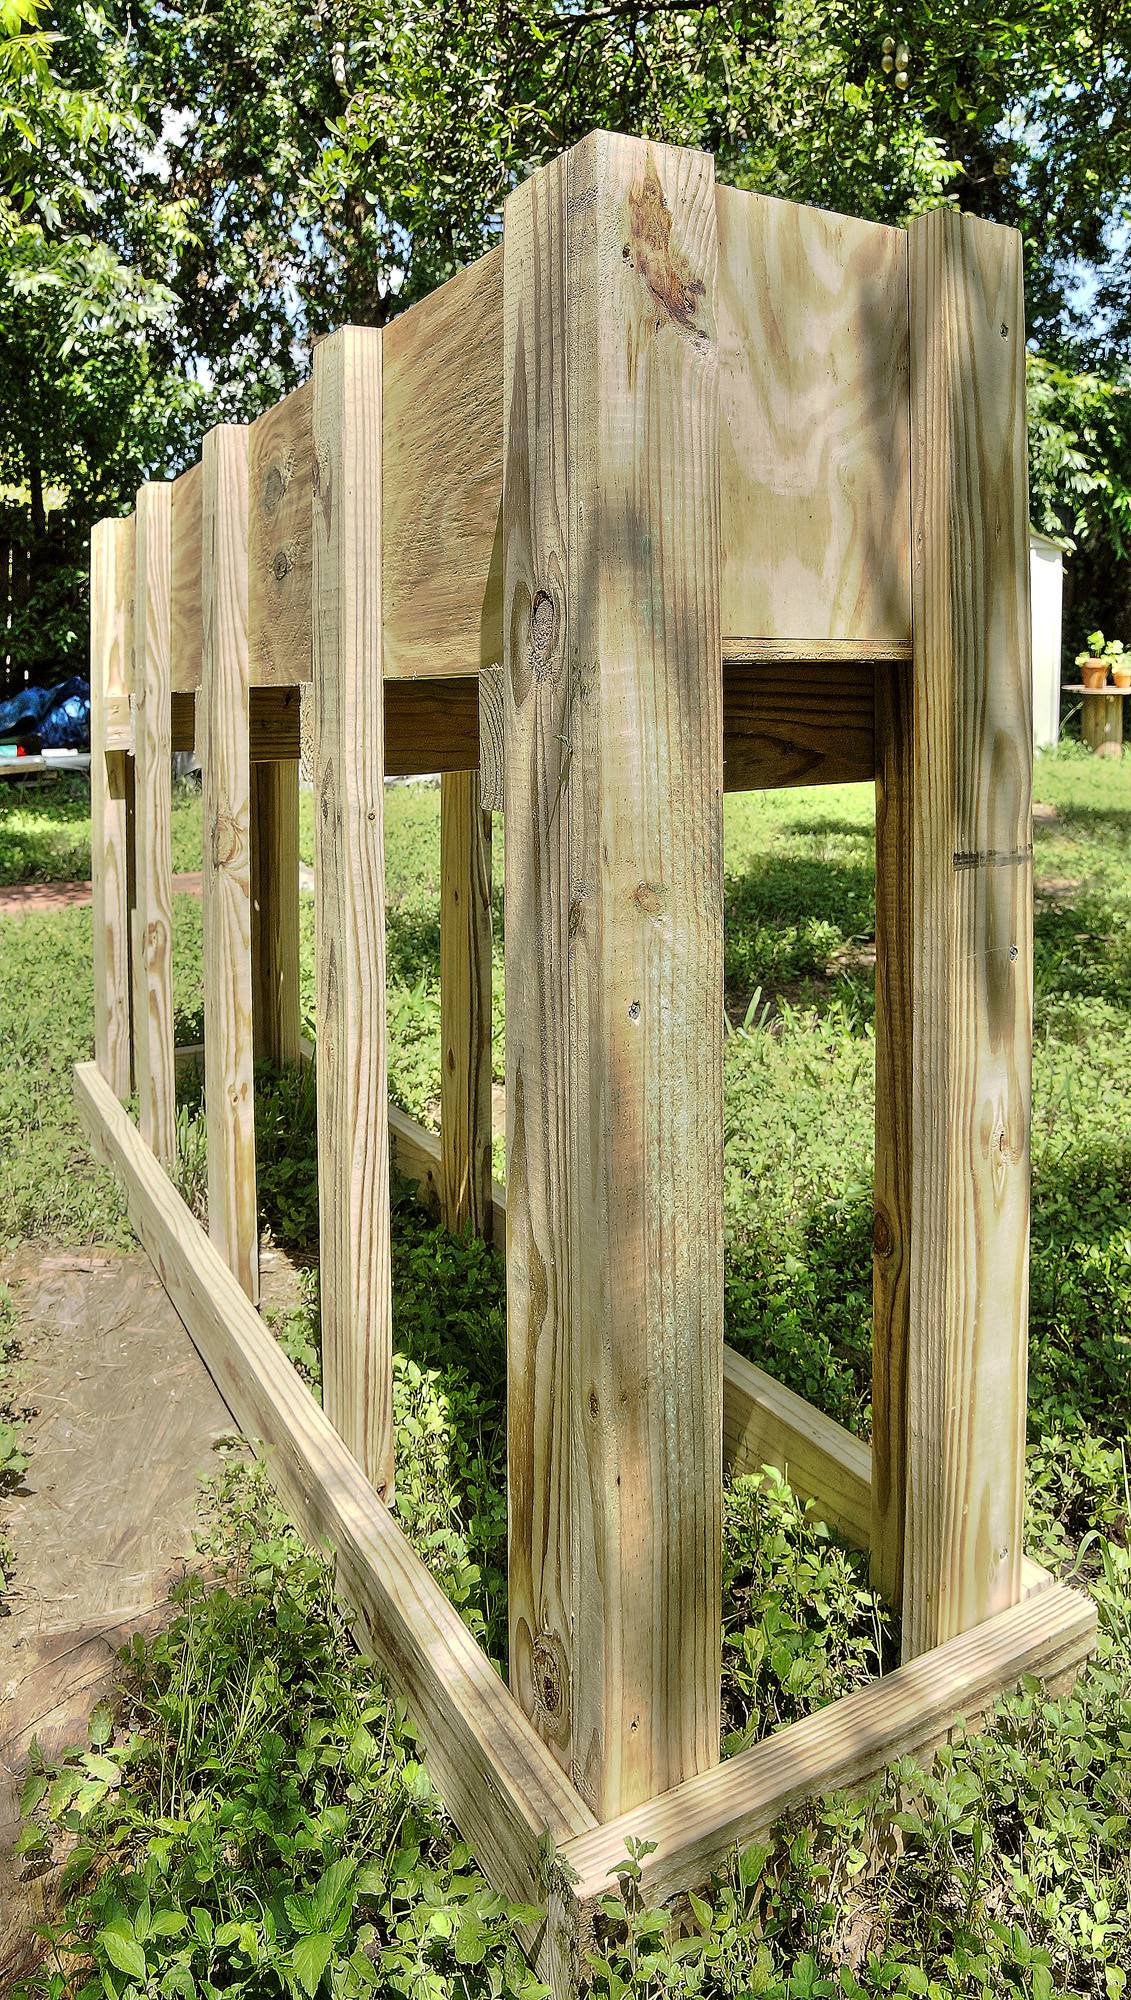
7: Complete the structure
You've got the basic form at this point, and now it's time to finish it off. Drop the plywood bottom in place and drive a few screws down into the crosspieces. You don't need a bunch -- the bottom isn't going anywhere. Attach the plywood ends as well, and now you've basically got it. Drill some holes as shown in the PDF to ensure proper drainage for your soil. Skip this step, and you'll have to grow aquatic plants.
8: Cladding
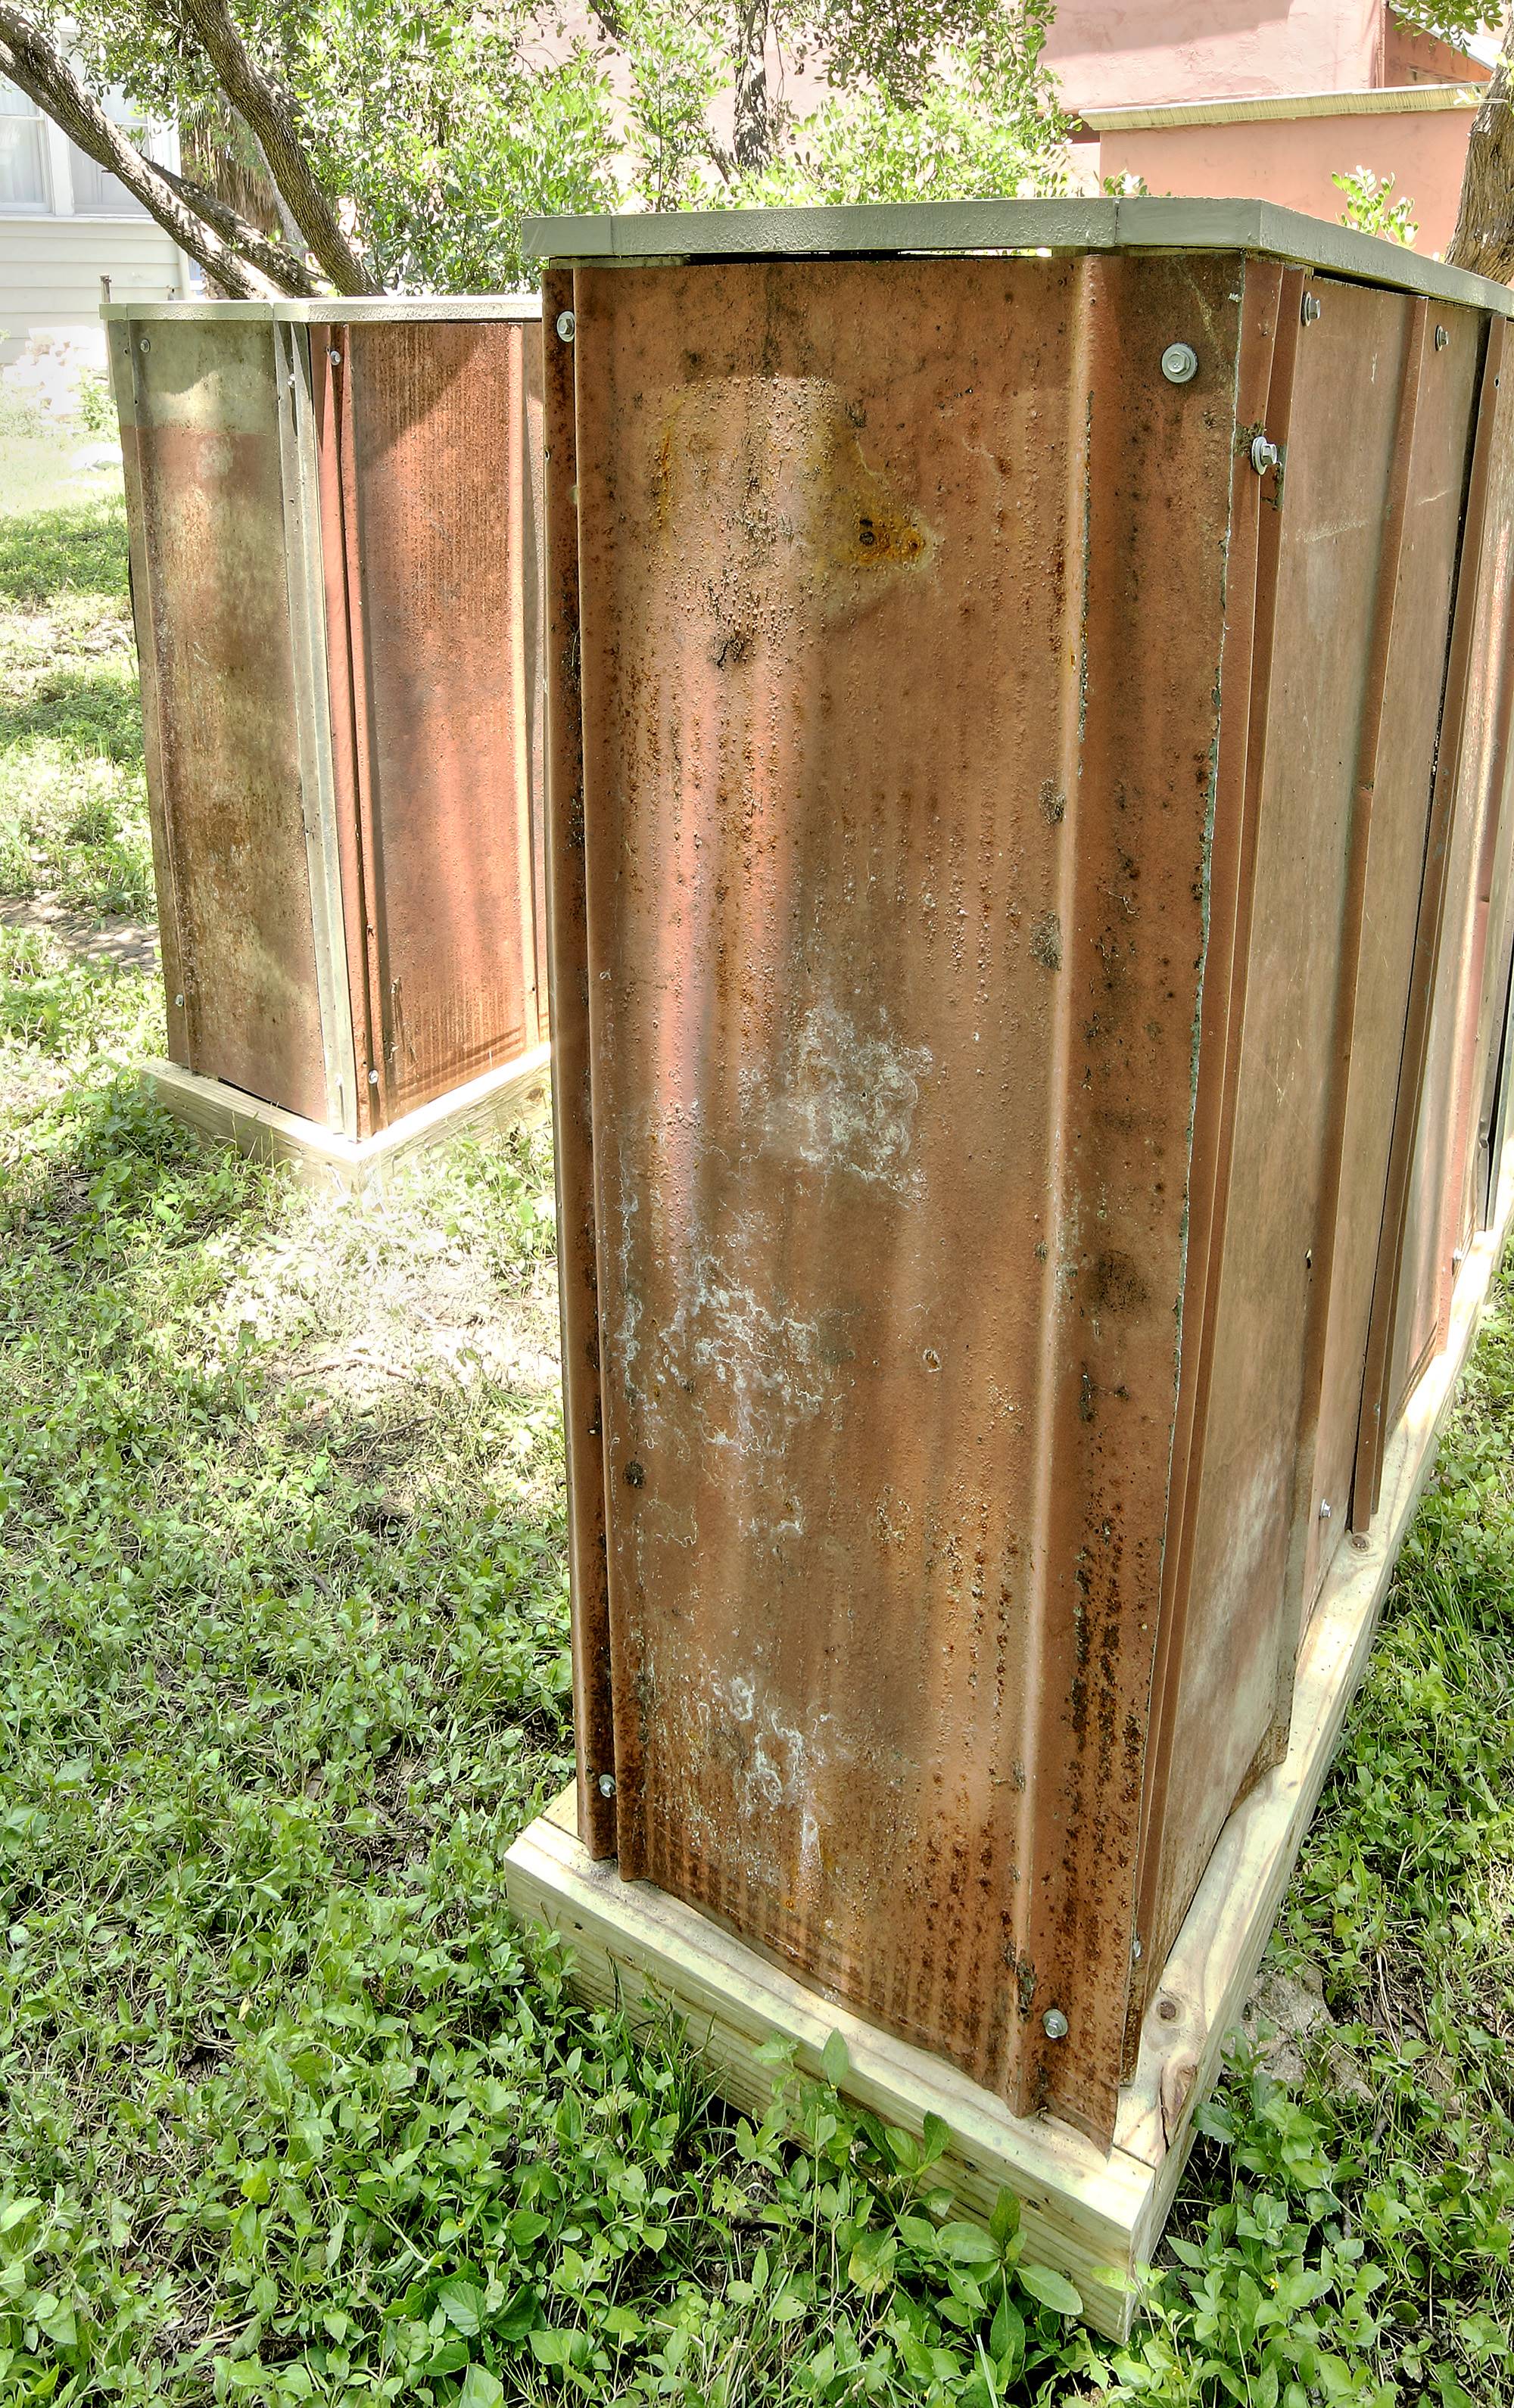
Last step in the construction. Since you'll be using whatever you've decided on here, I can't really tell you how to attach it. If you've made it this far, I expect you can figure it out. Feel free to put some more lumber in as blocking if your cladding needs it in order to lay flat -- my metal panels are a little warped, so I had to put in a little bit of wood as a backing to drive a few more screws through the cladding.
Now's also a good time to install the trim on top. Use finish nails (stainless steel) to nail down through the trim into the top of the vertical supports. You might want to pre-paint the trim to avoid getting paint on anything you don't want painted.
Now's also a good time to install the trim on top. Use finish nails (stainless steel) to nail down through the trim into the top of the vertical supports. You might want to pre-paint the trim to avoid getting paint on anything you don't want painted.
At this point, you can move your planters into position. They're heavy -- be careful. Get someone (or a couple of someones) to help.
9: Soil and planting
You’re going to need a lot of dirt. You can buy topsoil if you like, but you can also dig some up from your yard, amend it with manure and compost, and use that. Be sure to clean off any weeds and grass -- you don’t want that in your planters. Plant, water, etc. I’m going to be honest with you: I’m not the best source for the gardening part. Find someone with greener thumbs and follow their lead.
Ditto for planting. Using plants that are suited to your area is always a great idea, but herbs are herbs, and you want what you want.
That's it. Hope it worked out for you. Questions? Leave them below in the comments.